
Screenshots are like our personal gallery, only we know their importance and what they mean to us; Whether it’s gossip or something important with statistics. We all know how to take one, right? But that’s only the case for mobile devices; What if we have to take screenshots on some other device like Windows PC? In this case, you may ponder how to take a screenshot in Windows.
Well, nothing to worry about here. I have your back. Ella keep reading and you will get your answers on how to take a screenshot on PC.
How to take screenshots in Windows 10?
Here I have put together several methods to take screenshots on PC, take a look and see which device works best for you.
Method 1: Use the Print Screen key
The first and easiest way is to use the print screen key/shortcut to take a screenshot in Windows. The key is ‘prntscn’. You can easily find this key on the top row of your keyboard, where the function F# keys are located. So capture your entire screen for the screenshot, and to save it, all you have to do is press the Windows key and the Print Screen key, and you will have your screen captured.
Your screen will darken slightly to indicate that a screenshot has just been taken, and then you can find the screenshot taken in the “Pictures” section of your device.
Method 2: Press Alt + Prt Sc.
If you are looking for ways to take a screenshot on Windows with only one active window, then you can easily go for this method.
- For this, all you have to do is press Alt + Prt Sc on your device.
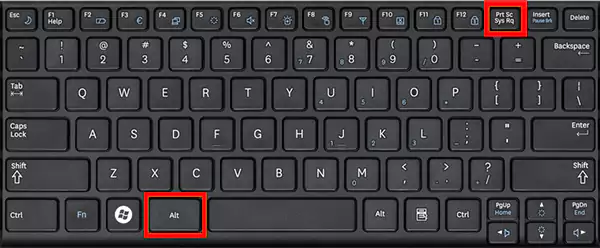
- For this, to take a screenshot of the currently active window, you first need to select the window by clicking on it, and then you can just take a screenshot the way you want.
- We press the Alt+ Prt Sc buttons on our device.
- Once this is done, you have the image copied to your clipboard by itself; you can easily recover it by pasting it into other folders.
Here’s how to save the file to your device:
- Press Windows Key + Print Sc.
- Now by default your screenshot will be saved in C: users images > screenshots.
Method 3 – Use Windows Logo + Print Screen Keys
Here’s how to take screenshots in Windows using the Windows logo + Print Screen keys;
- If you want to take a screenshot on a Windows PC and want the file to be saved to your device automatically, press Windows Key + Prt Sc.
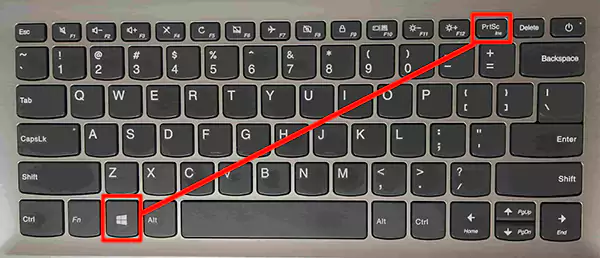
- You will notice that your screen has gone dark for a while, indicating that a screenshot was taken.
- This will save the file to the Pictures > Screenshots folder.
Method 4 – Use the Snipping Tool
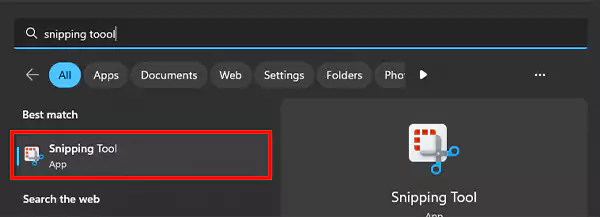
Did you know that your device already has a tool that allows you to take a screenshot of any screen and any size? Well, if you didn’t, now you do. There is a tool called Snipping Tool on your Windows device which is made solely for capturing a screen. Let’s learn how to take a screenshot in Windows using the Snipping Tool:
- Just type ‘snipping tool’ in the search bar of the search option.
- Click Snipping Tool. A rectangular box will appear on your screen.
- Then launch the screen whose screenshot you want to take and click on the ‘+’ sign of the snipping tool.
- The screen will go dark and you can drag the down arrow to the screen and take the screenshot.
- Once this is done, you can save the file to the desired section of your device.
Note: Using the Snipping tool to take the screenshot on PC will not automatically save the file to your device. For this, you will need to do it manually by right-clicking on the screenshot taken.
If you want to take a screenshot of a page that won’t let you press any other keys, like the Gmail settings bar, you can set a timer in the Snipping Tool and it will start itself after that. Here’s how to take a screenshot on a computer:
- Launch the snipping tool on your device.
- There, from its top menu, click on the Clock icon to set the timer.


- Select the length of time you want to delay trimming; 2, 5, 10 or 15 seconds.
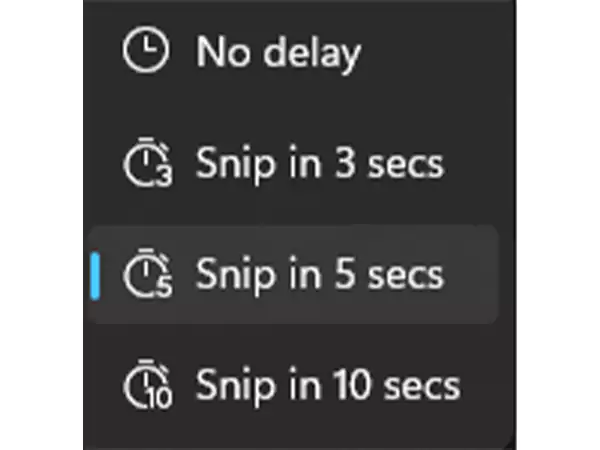
- After that, when you click the ‘+’ sign, the plugin will start after the desired time you just set. And that’s it, you’re done
Also Read: How To Fix Windows 10 Error 0x80080008?
Method 5 – Use the Snip & Sketch App
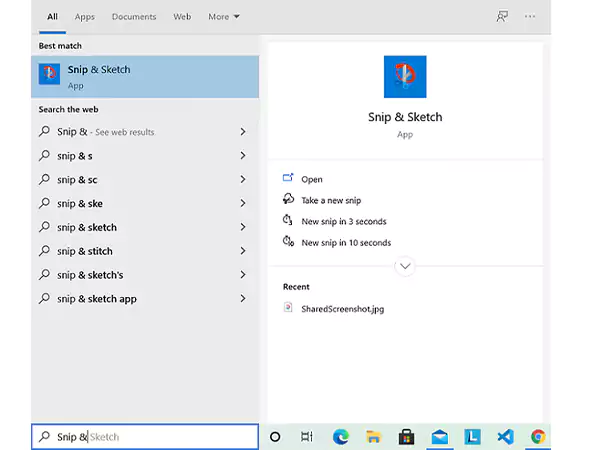
Now that you are well acquainted with the Snipping tool, you should also familiarize yourself with the Snip & Sketch app. The app recently replaced the Snipping tool on all Windows devices. If you want to customize, share or even annotate your captured screen, then Snip & Sketch app is perfect for you. Let’s see how to take a screenshot on Windows with the Snip & Sketch app:
- Activate Snip & Sketch on your Windows device by pressing Windows Key + Shift + S or simply search for it from the main menu.
- When the app starts, your screen will dim a bit, just like in Snipping Tool, and a menu will appear at the top of your screen.
- You will see a free-form rectangular window or a full screenshot of the computer that is required to take the screenshot on the device.
- There, you will also have the option to select how you would like to take the screenshot. Most of them are the same options found in Snipping Tool-
- You will have a Rectangular PC Screen Craft, FreeForm Snip, Window Snip along with a Full Screenshot or Snip.
- When you take a screenshot, it will copy it to the clipboard automatically.
- You can then paste the clipping into any document like a Word file or even Google Docs.
- And if you open the clipping directly from the application, a new window with the clipping will open.
Since the tool is mostly like the snipping tool, you can easily delay the plugin by setting a timer on it. What has changed are the forms of capture that you can take.
- FreeForm Cutout – Draw a freeform shape around the object.
- Rectangular Cutout: Drag a cursor around the cutout to form a shape like a rectangle.
- Window clipping: Select a window, such as a window dialog box, that you want to capture.
- Full Screen Snipping – Capture the entire Windows screen.
Note:The easiest and easiest way to capture a snip from the Snip & Sketch tool is by pressing Windows + Shift + S keys together.
Also, with Snip & Sketch, when you take a snapshot, unlike the Snipping Tool, it will be automatically saved to your device. So you won’t have to manually save the screenshot to your files.
Method 6 – Use the Game Bar
If you are looking for ways to take screenshots on Windows 10, then this is it; you can easily use the game bar to take screenshots on PC. In Windows 10, the Game Bar allows you to record your gameplay footage, record video, and even take a screenshot of a particular screen, and perform many other tasks as well. In fact, you can take screenshots in the game bar even if you’re not playing or in-game at the moment; let’s see how:
- Press Windows Key + G to launch Game Bar. Just make sure that you only press these keys when you’re on the screen whose screenshot you want to take.
- Then, in the upper right corner of your screen, there will be a window called Stream and Capture. Then to take screenshots, just click on the camera icon from there.
- Now that you have taken the screenshot, it will be automatically saved in PNG format on your device.
Method 7: Press Power + Volume Up
Not many people know about this, but there is one more way to take a screenshot on a PC. For this, all you have to do is press the power button and the volume button simultaneously. With just this, your screen will go a little darker and you will have your screenshot saved in the Pictures folder of your device.
However, if you have a Surface 3 or earlier and are looking for ways to take a screenshot on a computer, all you have to do is press the Windows button and the volume down button on your device.
Method 8 – Use a third-party app for the same
Well, if none of the above methods worked for you, maybe you are stuck on your Windows 10, but before that, I have something else for you, you can always use any third party app. All you have to do is search for an established and trusted third-party app, install it on your device, and use it to take screenshots on Windows.
It often happens that the methods provided by Windows do not work to capture screenshots, this is where third-party applications come to the rescue. They come with some comprehensive and innovative features that make taking screenshots on any device or app easier than ever. Here are some of our top recommendations:
ScreenRec – A free Windows screen recording tool that allows you to capture screen and even record screen for free. It also has some tools and features that allow you to annotate your recording.
Greenshot – Another free tool that not only allows you to take screenshots but also allows you to edit and customize them in various ways.
Lightsocial – One of the most preferred and used screenshot tools on Windows. As its name says, it is specially designed for quick sharing on social networks. Once installed in Windows, it replaces the Print Screen functions, offering more editing features.
And that’s all; these were all the ways you can use to take screenshots on a PC. I hope one of them worked for you by solving your query on how to take screenshot on computer.

Read more Author: Mehak Gupta I never really imagined myself being in this vein, but now that I’m here, I feel like this is what I was meant for. I really enjoy writing and putting my thoughts into words. I believe that communication with words is the purest form of communication, and of course an interesting form as well.
Categories: How to
Source: vtt.edu.vn