Listen to the Podcast:
You understand how frustrating it is not being able to save significant changes you’ve made to a Word document due to a power outage or unexpected word processor failure. Fortunately, Microsoft Word processor has a wonderful feature called AutoRecover which, by default, saves your files and documents every 10 minutes.
You may want to know some efficient ways to restore files and data that have been mistakenly lost or deleted. Don’t worry; This post will discuss how you can recover accidentally lost, deleted, replaced or unsaved files when using Microsoft Word on Windows. You can also read the complete guide to recover unsaved Word documents on Mac without fail.
Part 1. Recover Unsaved Word Documents Using Windows Auto Recovery Feature
One of the best features of Microsoft Word, AutoRecovery, keeps Word document edits updated automatically every 10 minutes. However, changes made within 9 minutes of closing the app cannot be stored. It is important to understand that AutoRecover is not a replacement for Save. AutoRecovery works best in emergency situations, such as a quick termination of an application or a PC power outage.
Restarting Microsoft Office Word software is often what you need to do to recover an unsaved Word document on your Windows system. The unsaved file you were working on will be accessible via a new popup message.
You need to manually search for the lost Word document if this approach fails to successfully recover your unsaved document. Now we will see how to use AutoRecover to restore a Word document that was not saved in Windows.
Step 1. Open Microsoft Word application on your Windows computer and select “File” -> “Options”. Click “Save” on the left sidebar, then copy and paste the AutoRecover file location path into File Explorer.
Step 2. In File Explorer, find the unsaved Word document and copy the .asd file.
Step 3. Now go to word processor, click “File” -> “Open” -> “Recover Unsaved Documents” in the bottom menu.
Step 4. Paste the copied .asd file into the File Name box that appears. Finally, recover it by opening the Word document file.
Don’t worry when you see a notification like “Word experienced an error…”, just repeat the steps mentioned above, click “Open” and then select “Open and Repair” from the drop-down menu in the Unsaved Document window.
Part 2. How to Recover Word Documents Not Saved in Temp Folder?
If Auto Recovery is enabled beforehand, you can find the unsaved Word document in an alternative way. Here is how to recover unsaved word document in temp folder.
Step 1: Launch Microsoft Word and select “File” from the menu at the top left.
Step 2 – In the context menu, click on “Manage Document” and select “Recover Unsaved Documents”.
Step 3 – If you recently lost your unsaved file, you should be able to find it in the start window.
Step 4 – To successfully keep the recovered file, open it and select “Save As” from the top menu bar.
If you have not enabled AutoRecover, you can refer to the following instructions:
Step 1: First, launch Microsoft Word application on your computer, then select “File”>”Options”>”Save”.
Step 2 – Check the boxes next to the “Keep AutoRecover information for X minutes” and “Keep last saved version automatically if I close without saving” options, and then click OK. (You can set the time interval you want to save the documents in this step.)
Part 3. How can I recover deleted Word documents on Windows?
The following solutions can help you restore Word documents that were saved but deleted unintentionally.
Solution 1 – You can recover deleted Word documents from previous versions
You can use earlier versions of Windows to perform this task and recover saved but deleted Word documents. If you turned on Previous Versions before the data loss, your PC will save the most recent system backup of your files. To restore your Word files on Windows PC, follow the steps.
Step 1: Open File Explorer and click on the folder from which your Word documents were mistakenly deleted or lost.
Step 2 – Right-click on that folder and from the dropdown select Restore Previous Version. You will see multiple versions that your computer has saved.
Step 3: Select the latest version of your desired Word document and then at last click on Restore.
Solution 2 – Use File History to Restore Deleted Word Documents
If you have enabled the native Windows File History feature, you should be able to recover deleted files. Here are the steps to use file history to recover deleted Word files:
Step 1: Go to Control Panel -> select “System and Security”.
Step 2 – In the main window, select “File History” (see image below).
Step 3 – Find “Restore Personal Files” and click on that option.
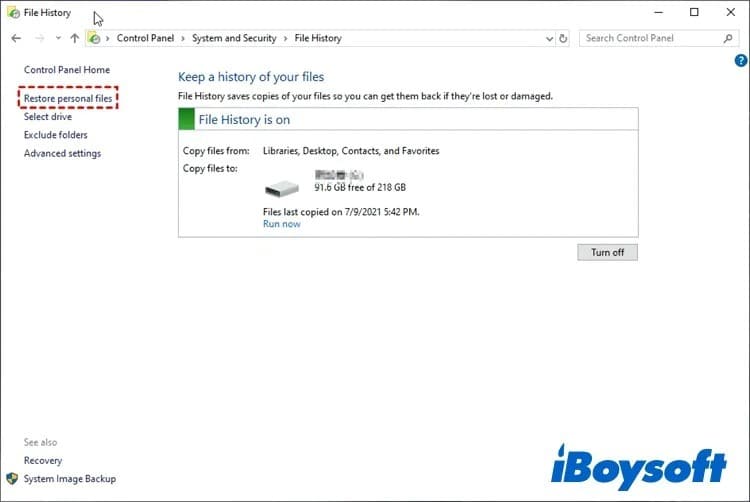
Step 4 – To recover your data, find the deleted Word file and then click the Recycle icon at the bottom of the window.
Solution 3 – Recover Deleted Word Documents from Recycle Bin (Windows)
Recovering a deleted Word document from the Recycle Bin is easy if you haven’t already manually cleaned up the Recycle Bin after deletion.
Step 1: Open the Recycle Bin on your computer and use the file name to find the deleted file. Alternatively, you can search for documents by file type, for example, DOC, DOCX, etc.
Step 2 – Find the desired Word document and choose “Restore” from the context menu.
If you have already manually emptied the Recycle Bin on your PC, it is recommended to use professional recovery software to recover deleted or lost Word document files. Part 4 will show you how.
Part 4. Recover Deleted or Lost Word Documents Using Windows Data Recovery Tool
Take iBoysoft Data Recovery for Windows software for example, it is an easy-to-use file recovery tool that you will need when Word documents are suddenly lost due to accidental deletion, power outage, hard drive reformat, system corruption of files or disk error.
More importantly, its advanced file scanning and data recovery algorithms ensure that you can also recover unsaved, deleted and lost Word documents from corrupted, unreadable and unmounted USB flash drives, external hard drives and other external storage devices.
It is recommended to stop saving any files on your computer because doing so may overwrite your lost data and decrease the chance of recovering lost Word documents. The software tutorial below will guide you through the recovery of the lost Word document:
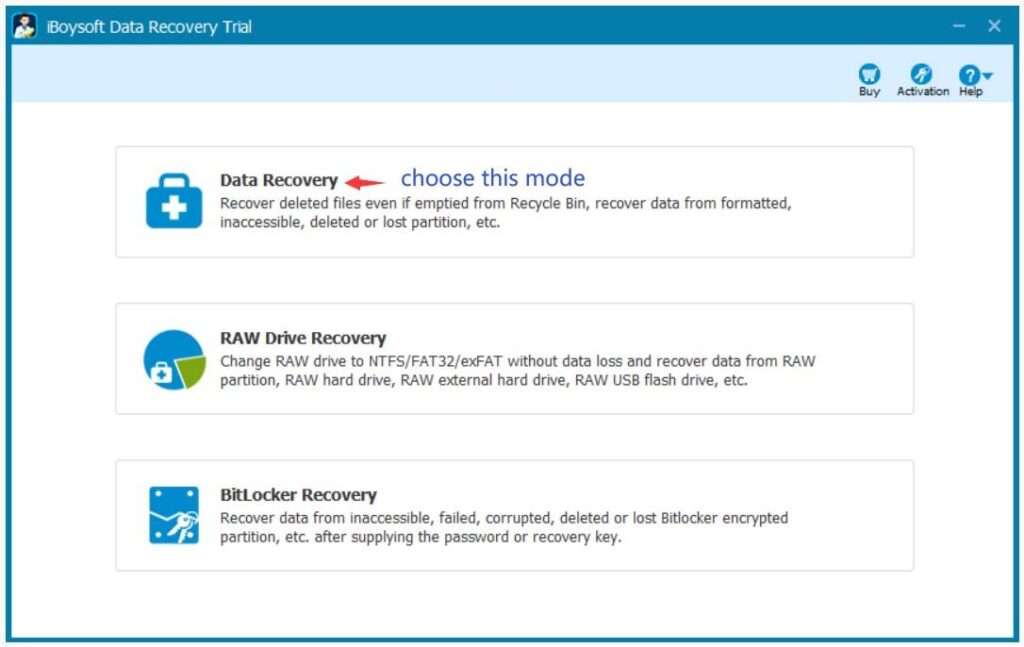
Step 1 – Download iBoysoft Data Recovery software on your Windows computer, install the software, and then select the first data recovery mode on the main interface.
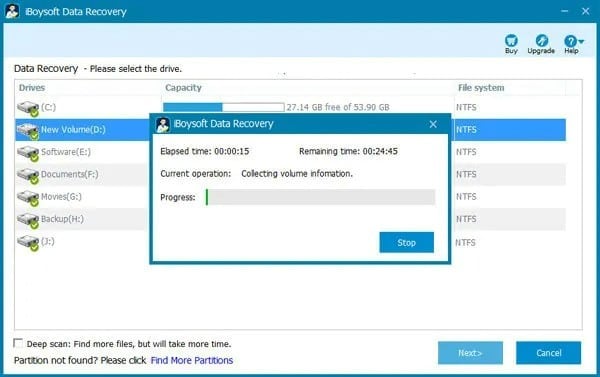
Step 2: In the list of drives, find the drive where the file loss occurred and then click “Next”, the software will start to scan the partition immediately.
Step 3 – When the scanning process is finished, you can right-click on the recoverable file and choose Preview to check the content.
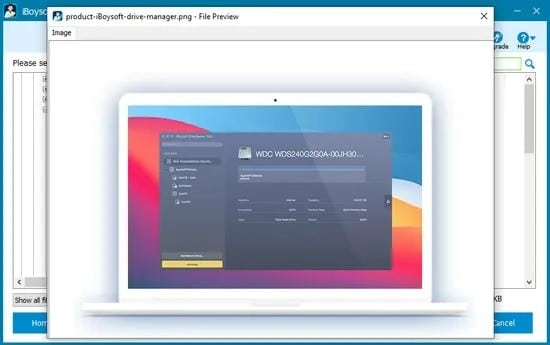
Step 4 – To recover lost Word documents, check each box near each file and then click Recover. (An important tip: you should save the recoverable documents on another partition or on an external data storage device.)

Subscribe to our latest newsletter
To read our exclusive content, sign up now. $5/month, $50/year
Categories: Technology
Source: vtt.edu.vn
