
Creating a Facebook account offers many useful features and that is the reason why we all have become addicted to it. The ability to chat via text, audio calls, video calls, send GIFs, images, etc. just made Facebook an inevitable part of our lives. Its security features are also so advanced that you can never get locked out of your Facebook account unless you have enabled all the security measures it offers.
You can simply reset your FB password using your recovery information such as email address and phone number. But in case you want to recover your Facebook account without an email address or phone number, you can also do it using the trusted contacts option. To use trusted contacts to recover your Facebook account, you must have added at least 3-5 trusted friends who you can contact whenever you need to.
Here is the step by step tutorial that you can watch:
Steps to Add Trusted Contacts on Facebook for Easy Recovery
This is how you can add trusted contacts on Facebook:
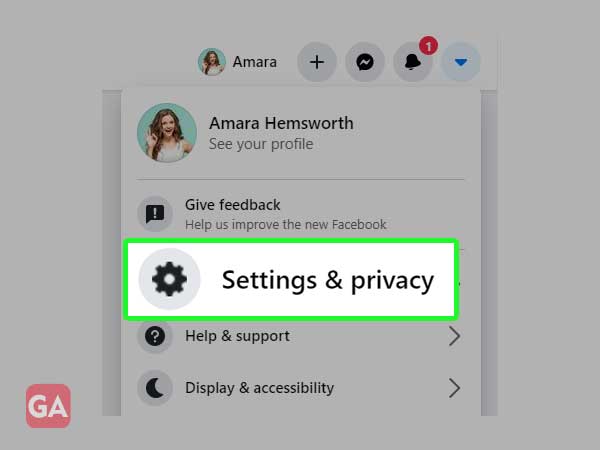
- First of all, log into your Facebook account and click on the dropdown menu at the top right corner.
- Click on the ‘Settings and Privacy’ option
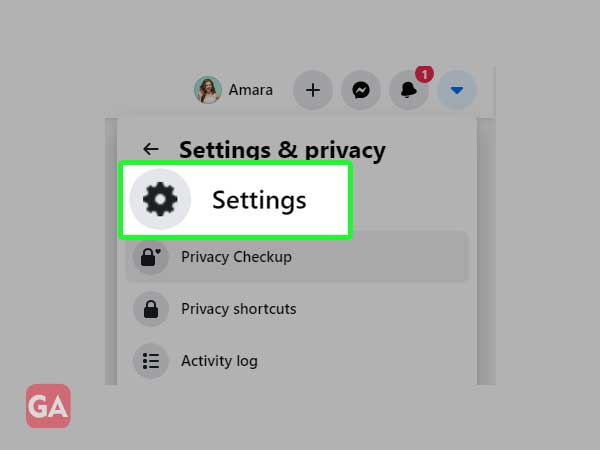
- Again click on the ‘Settings’ option
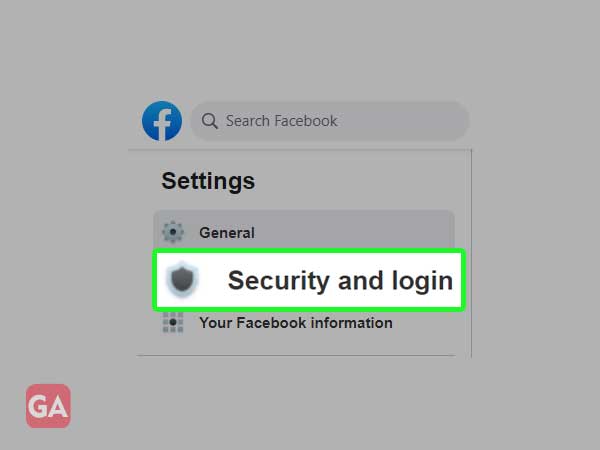
- Go to the ‘Security and login’ section
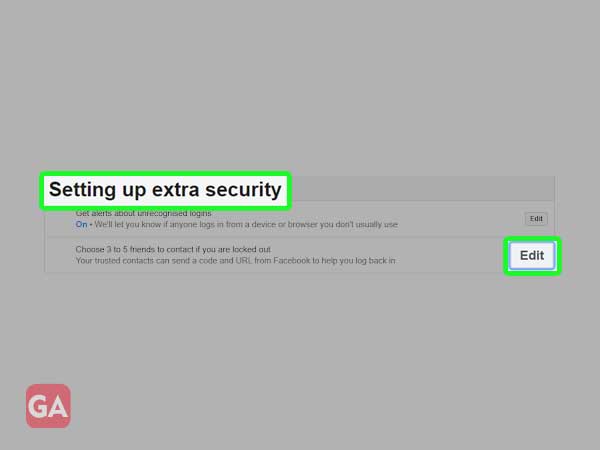
- Scroll down and under the ‘Set up additional security’ section, click the ‘Edit’ option for ‘Trusted Contacts’.

- Click ‘Choose Friends’ to start adding your friends.

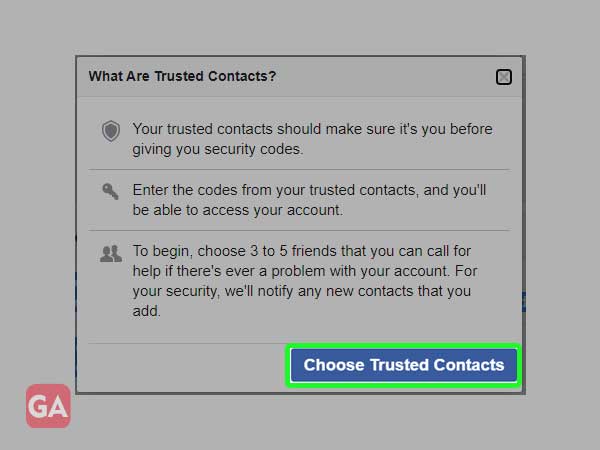
- Read all the information about the trusted contacts method and click on ‘Choose trusted contacts’
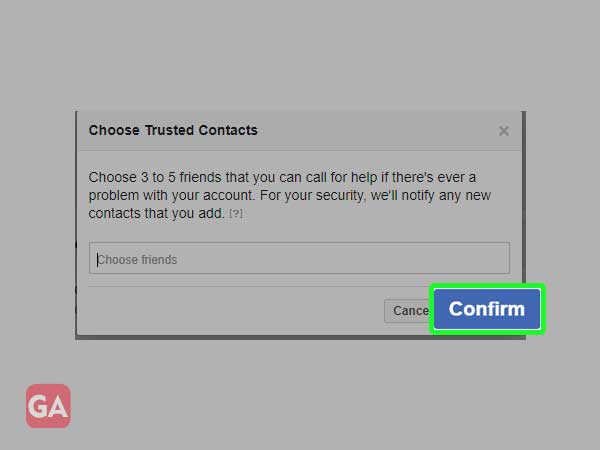
- Start typing the name of your Facebook friends you want to add as trusted contacts; you have to add a minimum of 3 friends and a maximum of 5. Once this is done, click on ‘Confirm’.
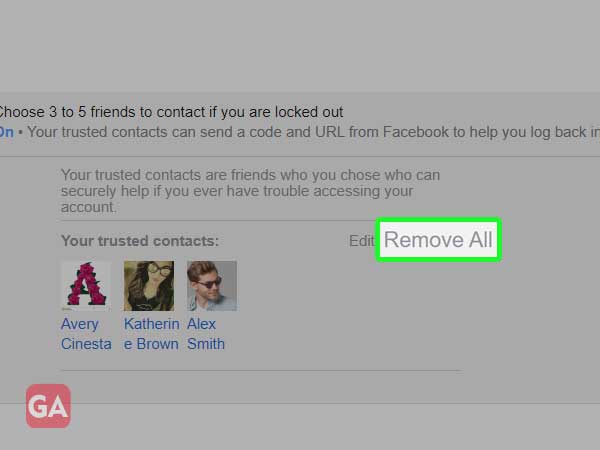
- That’s all you have to do to turn on the trusted contacts option for quick Facebook recovery. To remove trusted contacts, you need to perform the same steps and click ‘Remove All’
To use trusted contacts for Facebook recovery, you can refer to this guide: Use trusted contacts for Facebook recovery
Categories: How to
Source: vtt.edu.vn